Friday, November 29, 2013

Black Friday: Looting and Reclaiming

Its Black Friday!!!  How many of you ventured out of the house into the Zombie Shopping Apocalypse?  Me, not so much into that these days.  However, the local game shop had a Black Friday sale that was not to be missed, so I did head on over there to check out the stock.  Although it was a bit more crowded than usual, I didn't have to avoid being trampled, camp out, or kill anyone (lol).   

I have been tossing around ideas for my next Warhammer 40k army.  With the Ogre project starting to see its finishing (at least the playable army), I want to get back into 40k.  However, wanting to avoid competitive play, I'm looking for an army that is:

a.) Relatively new or being Released soon
b.) Fun to play, with plenty of variation.
c.) fun to paint/model.

With the Tyranid and Ork releases on the horizon in 2014, those were my top choices.  Tyranids would field an army completely the opposite of my long-tenured Imperial Guard and Orks are an old love of mine.  What I didn't think about until browsing miniatures today, were the good ol' Chaos Daemons.  How could I have missed them?  I'll probably wait until the Tyranid Codex drops (next month I hear?) to decide, but in the meantime I picked up some miniatures for both to see what I like to paint.  Tyranids have a lot of cool painting options and are far more different than any other army, but the Daemons offer the diversity of color and out-of-this-world imagination.  To top it off, also picked up a copy of Triumph and Treachery.  5-player Warhammer sounded fun!


Score!


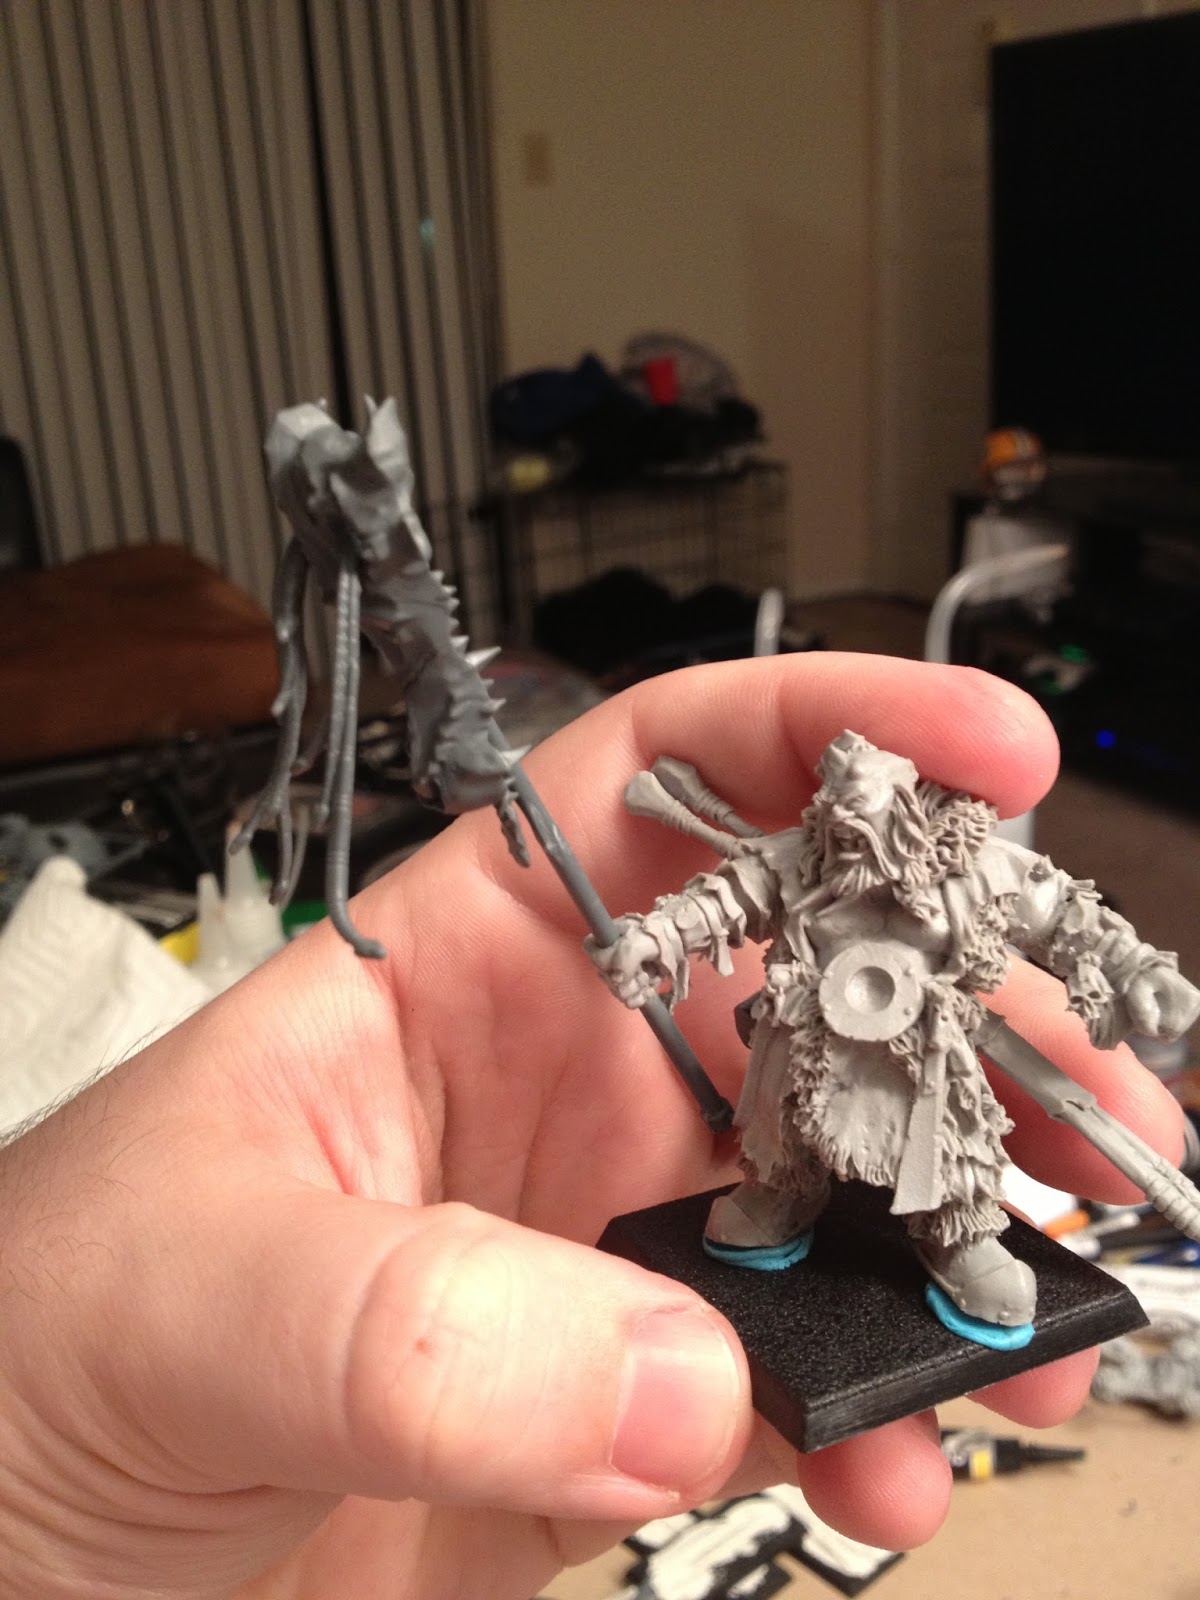
After I scored at the Black Friday sale, I went home and began working on a hodgepodge of projects.  Finished up the assembly for my Skullvane Manse, primed my Ogre BSB and Hunter/Beast Wizard, and began work on the Wreck Age Reclaimers below.  Have some ideas for color scheme and basing, so I'm going to try a few things out.  I did get them assembled and attached to their bases.  I will be updating these on a regular basis and talking about how I took each step.  The weather here is crazy, so I'll have to prime them tomorrow evening when we go above freezing.  I feel like I live in the desert...  Maybe that'll get me in the zone to paint some wasteland bases!


Testing out one of the special effects paint from Citadel.  This one is Agrellan Earth - GW's crackle medium.  To avoid any serious issues on the reclaimers (since I've never used the stuff) I've tested it on a regular Wreck Age Staker model.  


Spending the day tomorrow working on models... So I'll have another update at the end of the night.  Happy Black Friday!

Sunday, November 24, 2013

Quick Update - More to come

Hello!  Been working on quite a few things.  I finished my Thundertusk, but I had to drop it off at the local GW store for a competition that is coming up.  Once I get it back, I will post some good pictures of it.  Looking forward to going into the final stages in finishing up a playable Ogre Kingdoms army.  I signed up for Adepticon during pre-registration (lucky enough to get a VIG ticket) and will be participating in the Big Brawl (3000pt Warhammer Tournament) with my Ogres.  Guess I'll have to get them done one way or another.  Since the Thundertusk is done, next up will be will be the maneaters (which I've assembled and cleaned up, save some green stuff work on a couple) and my custom BSB I made from an Ogre Bull.  
Maneaters ready for paint!

However, before I get started on the next Ogres up, I will be working on a special project.  The picture below is of the new Wreck Age Reclaimers that I will be painting for Hyacinth games.  I'm hoping to spend quite a bit of time and effort on these as they are set to grace the box art!!  I will be providing regular updates on my progress with them on the blog.  Be sure to pick up your pre-order over on the Wreck Age site.


While I'm waiting to start on these guys, I decided to do some miniature assembly tonight while watching some football.  Back at Gencon, I picked up a copy of Super Dungeon Explore and I've been anxiously waiting to play.  Opening the box the other day, I realized that the assembly of the models will be a bit of work, so I wanted to get started.  I like the models and very much look forward to painting them, but I am disappointed with how difficult they are to clean up/remove mold lines.  The models are the new wave rubbery plastic... meh.  Hopefully I can find a better way to clean em up - I want them to look nice.  Anyway, got the heroes assembled from the boxed set and the dragon.  I will work on the baddies soon.  


Finally, I was cracking up at a phenomenon that repeats itself all too often for me as I paint models over and over.  My painting area always starts out very organized, neat, and well kept.  I can always tell how close I am to finishing a project though based on the messiness of my desk.  I'll close this post off with a funny before and after pic of my work area in the living room.  Thanks for reading!


Before

After!


Monday, November 11, 2013

Check out the New Tutorial Section!!!

Hello!  Rolling from my weekend progress on the Thundertusk, I started work on the base and the Ogre riders tonight.  Still a lot more to finish, but my goal for the night (albeit a late start) was to get the airbrushing portion.  You can see the progress below. 

I have to say, I did pick up the Deathworld Basing Kit from Games Workshop. I initially criticized these packs as very overpriced.  However, the bits included in the set are actually really cool.  Probably still not worth the price, but there are some interesting resin bits that are included.  Many of which I plan on using for a diorama in the future.  


Anyway, I used one small bit from the basing kit on the monster base, which you can see on the front, right side (just a skeleton).  I am painting the base to be consistent with the rest of the army - I also did go ahead and use the small base bit from the Thundertusk kit.  

I'd also like to announce and point out the new Tutorials section of the blog.  To your right, under the chopping block you will find the link list of Tutorials that I plan to start.  I've already made the first one - A step by step (with pictures!) on how to replicate the Ogre Skin that I use for the Ogre Kingdoms project.  I will also post a step-by-step for the base seen below once I am finished.  Enjoy.  And please feel free to offer suggestions on how to improve the tutorial - This is my first. Thanks!  More to come soon!


Sunday, November 10, 2013

Can you hear the Thunder?

Sooooo... I promised that I was going to start working on the Thundertusk.  Aside from cleaning up the model and priming.  I started yesterday and finished the monster up today.

I think I mentioned this before, but credit to Dreadboi on the Ogre Stronghold forums.  I based the model on his tutorial in those forums.  He did a much better job keeping up with his progress than I did, so you can check his tutorial here.  Started with a black undercoat. 


Here is the base - got it done while I waited on the model to dry.  I now have it primed white and should get it started soon.


A couple of shots before the last bit of detail work was finished.  I'm particularly happy with his face - tried to duplicate the box art.


The finished model.


I'll start the riders this week.  Already have them primed and mounted on cork for painting.  Also have a empire soldier that will hang from one of the hooks - any suggestions for colors for the poor chap?

Thursday, November 7, 2013

Update

Gonna start prepping a couple miniatures tonight for work coming up.  I did change up the priority a little bit - the next miniature I will be working on is the Ogre Thundertusk.  I've had this for a while and the local GW store is doing a competition for monsters / monster sized models.  Hopefully it will give me some motivation to get it done.  

Found a nice step-by-step that someone (Dreadboi) did in the Ogre Stronghold forums, so I'm going to start with that and tweak it.  

Also waiting on some minatures to come for Wreck Age - the new reclaimers... and I will paint them promptly upon arrival - The first miniature was fun to paint and these look awesome.  Check them out on the Wreck Age site.  

Will post updates as I have them.  With a large model like the Thundertusk, I'll have to take my time (I want to win!) 


Tuesday, October 29, 2013

Ogres, Drifters, Zombies, oh my! Updates Galore!

Its been far too long since I've been able to update this blog... and I'm sorry.  Good thing there's only like one or two people that see it. :)

Although I haven't updated, there has been plenty of progress.

I was a bit derailed... having started playing Final Fantasy XIV: A Realm Reborn, the reboot MMO from a couple of years ago.  It is a wonderful game and I've spend quite a few distracting hours adventuring with my friends.  Haven't given up on FFXIV either, but it did delay some of my painting projects, but also provided me with a couple weeks of time off - to motivate me.  

Ogre Kingdoms project is very much underway.  Since the last post I have finished off the Mournfang Cavalry.  Not too happy with the results, but they are tabletop worthy, imho.  I may go back and do some spot touchups - also considering doing some more in the future to replace these.  I really think painting 4 at once hurt my progress and actually this is the biggest hang up I've had during this 2+ month hiatus from the blog.  Once I got back to them, I started rolling.  

The mounts themselves are what disappointed me the most.  I just couldn't really figure out a scheme that worked well.  The box art mournfang look so good... but have that animated feel to them.  I couldn't really pull it off, but i want to try again.  It might be that the airbrush work I did kind of clipped my wings.  Anyway, I got them to tabletop and moved on.  I am very happy with the way the banner turned out... see the pics below:


Shortly after finishing the Mournfang, I spent some time cleaning up my first Ogre Bulls.  I had started out painting Ironguts for the army and thought they were a blast, but I was pleasantly surprised that these weren't boring and actually a breeze to paint up.  

Also happy with their standard bearer - The Skull was painted entirely with the airbrush (save the straps/accessories hanging).  Wasn't too hard.  Some of these details are better done with light to dark technique.  

Spent some extra time on the champion, adding some chains to the improvised trap weapon.  Painted his beard a little lighter to make him look grizzled as compared to most of the other Ogres.  


Aside from the Ogres, I was finally able to spend some time on Wreck Age.  If you haven't checked out the game yet, please head over to their website.  Its really cool - I'm looking forward to spending some more time with it.  I love the post-apoc setting and miss the skirmish games from back in the day (Necromunda, anyone?)  Painted up this drifter below.  I don't have a lot of experience and practice with NMM, but thought it would look really good with this model.  Also hadn't painted a metal model in a while, so it was an adjustment (how I love plastic/resin)


And finally, I did receive my shipment from the Kickstarter of Zombicide Season 2.  Can't tell you how excitted I was before opening up the goods and the excitement was met by an even higher level of gratification once some friends and I cracked open Prison Outbreak and played through most of a mission.  The game seems to have gained some steam and the extra options and characters add a lot of flavor to what was already a highly enjoyable experience. Rose (The Zombicide equivalent of Angela Lansbury is a bleepin monster)

Unfortunately, after I painted Dave the Geek for the game earlier in the year, I didn't really go back.  Now, faced with an overwhelming number of Zombicide Miniatures, I decided to paint what was next on the block for this game - Wanda.  I will say that the new models seem to have more detail and thank God - Wanda was a little bit of a pain with the lack of definition.  Either way, happy with the results.  She pops on the board.  Sad that she and the other original survivors will likely be outshined by the new characters.  

For you fans, it looks like you can run a campaign of sorts with the new rules.... sweet.


Finishing up four sabretusks for the ogres now and then plan to jump to a couple of Ogre Characters and the Maneater unit...  I may have some more work for Wreck Age models as well, so I'll continue to post and update.  Thanks for reading!

Sunday, August 18, 2013

Not much done since the last post, though that one was a big one.  Finished up some work last week before getting some things done outside of the hobby world.  My brother and I took a short trip up to Indy for our first GenCon.  I was impressed.  I think if I go next year I will spend two days and stay overnight.  Also need to do some studying to see if there are any events that I would like to participate in.  All in all though - I enjoyed it.  

Got some loot - picked up a copy of Super Dungeon Explore with the special miniature (been wanting to try painting these minies for a while), an Angron Horus Heresy miniature from Forgeworld and a Beholder D&D miniature (Eye Tyrant).  Hopefully I'll have some time to paint these things and post them here someday!  ha.  

As I said earlier, had to have my carpet cleaned the other day so I was forced to break down my painting area for a while, which impeded progress.  Set back up today and went to work on some of the grueling parts of the Mournfang Cav.  Mounted them (with temporary pins) on their bases so I could paint them without my grubby hands stripping them of all their paint.  

More will be done this week... Emperor's will be done or err... by the Great Maw... 


Tuesday, August 13, 2013

Two days chocked full of Hobby Progress!

Hey hey hey!  Haven't had much time to post, but that's only because I've been hard at work prepping and painting.  Trying to ramp up speed on the Ogre Kingdoms project and so yesterday I did some inter-painting prep with the Mournfang Cav by finishing up the flock on the bases and priming them. Since I also need to paint their Standard Bearer's arm seperately, I figured putting finishing touches on the metal parts of the riders was pointless if I could do it all at once.  So, with that in mind, I set the Mournfang aside for a day for drying and decided to prep some future work for the chopping block.  

I started by cleaning up my finecast Sabretusk models.  A super pain in the rear, but getting it out of the way will make it easier to sit down and paint them.  I also pulled out a recently purchased Ogre Hunter model that I planned to convert and began going to town.  Although the Ogre Project, when finished, should allow me to have tons of options, I've had my sights set on a list that includes a level 4 Slaughtermaster with Lore of the Great Maw and a Level 2 Butcher with Lore of Beasts...  With my Slaughtermaster complete (see earlier post) I didn't want to do another traditional butcher model with the guts and gore.  I figured a Lore of Beasts Ogre would look a bit more natural... feral even.  

I cleaned up the model the best I could (All thats left for him and the Sabretusks are some greenstuffing and filling) and began work on conversion. 

His club had to go.  To me, it just didn't speak "Wizard."  I decided to give him a staff.  I cut the club from his hand and drilled a hole, using a hobby knife to smooth the edges around his grip.  

Spare parts from my extra Mournfang Cav box proved useful.  I cut the Banner off of the Standard and shaved the pole down to make a staff (still trying to decide to leave the staff as metal or go for a wooden one - he's an ogre, right?)  To make the model more durable, I drilled a small hole into each side of the staff proximal to his hand as you'll see below.  


Voila.  Afterwards I added the dragon skull from the Mournfang standard to the end of the staff.  He's starting to look more wildmage-ish alreadY!


Now... I had these plans for quite some time (to make the Beast Wizard). While I was at Games Day last month in the hotel reading the new white dwarf and drooling over the lizardmen models, one particular bit stood out to me.  The Bastilodon with the Ark of Sotek and it's many snakes made me smile big.  For the reason seen below. 


Very, very happy with the way he turned out.  Can't wait to paint him.  I stuck some other bits on him you can't really see from these angles, including a sack and a rack of ribs hanging on his back.  Also, I shaved down the spears on his back to look more like staves with gem heads.  This will help him continue to stand out as a magic user, rather than a killy character (Hunters are terrible anyways).  


With all that progress in the bag last night, I shifted my focus tonight back to the Mournfang.  Another reason I paused in painting last night is because I had some more airbrushing work to do and I don't like airbrushing unless I'm doing a bunch of different things at once. Never tried airbrushing a banner before, so I figured I'd give it a shot.  Don't really have a step by step for you because I was concentrating but I got the most important pieces.  


Below you'll see the first step.  I drew a crude (Ogres!) stencil of the image I wanted on the banner.  Don't know why I picked what I did - kind of like the main ogre symbol (The Maw) with dot in the middle to make a sun.  Sweet.  Again, crude design on painter's tape with a pencil and then used a hobby knife to cut out the pieces


Now, an undercoat for the banner.  I had primed the banner white.  With the airbrush and blending, I prefer to start with a light or mid tone and then shade (as done here - some models work the other way).  So I painted the banner with Vallejo Air Scarlet red.  I did some light shading with the single color, hitting the recesses and shady areas a litter harder with the paint.  After that was dry, i came back in with Vallejo Air Mahogany and shaded much deeper.  Here you see the finished red base.  


So, Keith, you're painting a red banner?  No!  This is our base for the stencil.  I used a pair of tweezers to stick the stencil pieces onto the banner.  Now the real work begins!


Airbrushing with several layers, starting light to dark, I finished up the main colors on the banner.  Although I didn't do a step by step, it wouldn't have helped without a video.  The main thing is to pay attention to where the light would hit the model.  Where light hits - use your brightest color there.  When you come back with each successive shade, hit the underside of the banner, where it will be darkest.  

Practice makes perfect - I did go a little extreme with the bottom of the banner where it is tattered - to show that it is dirty/burned.  

Colors used in succession are all vallejo air:

White > Sand > Light Brown > Flat Brown> Light Camo Brown > Burnt Umber


After the paint - i used the tweezers to peel off the tape and Boom!  Heres your banner!  Now all thats left, hopefully tomorrow, is to complete the details on the pole and the dragonscales on the banner - then it'll be ready to reroll some 1s and unleash it's breath weapon!


Again - don't like to airbrush unless I have lots to do, so I did the airbrushing work on the Mournfang bases as well.  I'll hit them with a dullcote so that I can mount the cats on them and paint em up!


Progress shots for the week... Yes!  Going well.  


Sunday, August 11, 2013

Had an active day.  Planned on getting some work out of the way and then doing some painting.  However, my day was sidetracked by this....

Needless to say I had a buddy help me change the tire.  I was on the way to the local game shop to trade some miniatures, so I feel its ok to post on the blog :).  

Special thanks to my girlfriend though - she kept encouraging me to paint though the tire incident kept me out of the mood.  Worked some more on the mournfang cavalry riders.  Got them pretty far - a couple more washes on the armor and then some detail work will finish them out and then I'll switch to the cats.  

I did try some serious freehand work for the first time and i'm happy with it.  Painted an eye on the shoulder guard on the unit champion.  Wanted it to look like a "creepy wild eye."  I think I pulled it off.  Probably needs a gloss coat to make it pop, but I'll take it.